How To Set Power Save Settings on a Windows Machine
This article provides steps to ensure the successful operation of the AirTurn Devices by setting the appropriate power save settings on a Windows 7, Vista, 8 or 10 machine.
WINDOWS 101. Click the Start button then click the gear icon for Settings and Click on the System button.
2. Click on the Power & Sleep tab from the list on the left
3. Click on Change Plan Settings next to your currently active power plan
4. Click Change Advanced Power Settings
5. Click the “+” button next to Wireless Adapter Settings, then click the “+” button next to Power Saving Mode, and from the drop-down menus, choose Maximum Performance for both On Battery and Plugged In.
Your Windows10 machine is now configured to favor wireless connection quality!
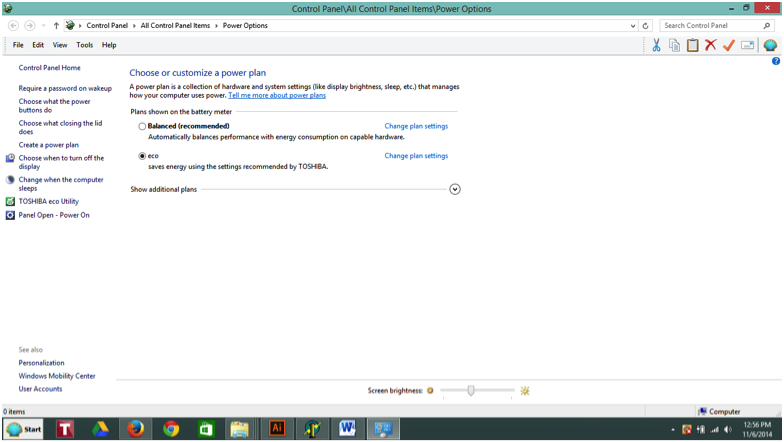
1. From the Start Menu find the Control Panel and select Power Options.

2. The Power Options Control Panel Item will Display.

3. Ensure that Power Saver or Eco (depending on your Windows version) is clicked. Now click Change Plan Settings. The Power Options diaglog will open.

4. Click "Change the Advanced Power Settings" and the "Power Option" dialog will open.

5. On a Windows 8.1 machine click "Change Settings That are Currently Unavilable".
6. Click the + box next to "Wireless Adapter Settings"
7. Click the + box next to "Power Saving Mode"

8. From the drop-down choose "Maximum Performance" for both "Battery" and "Plugged In"
